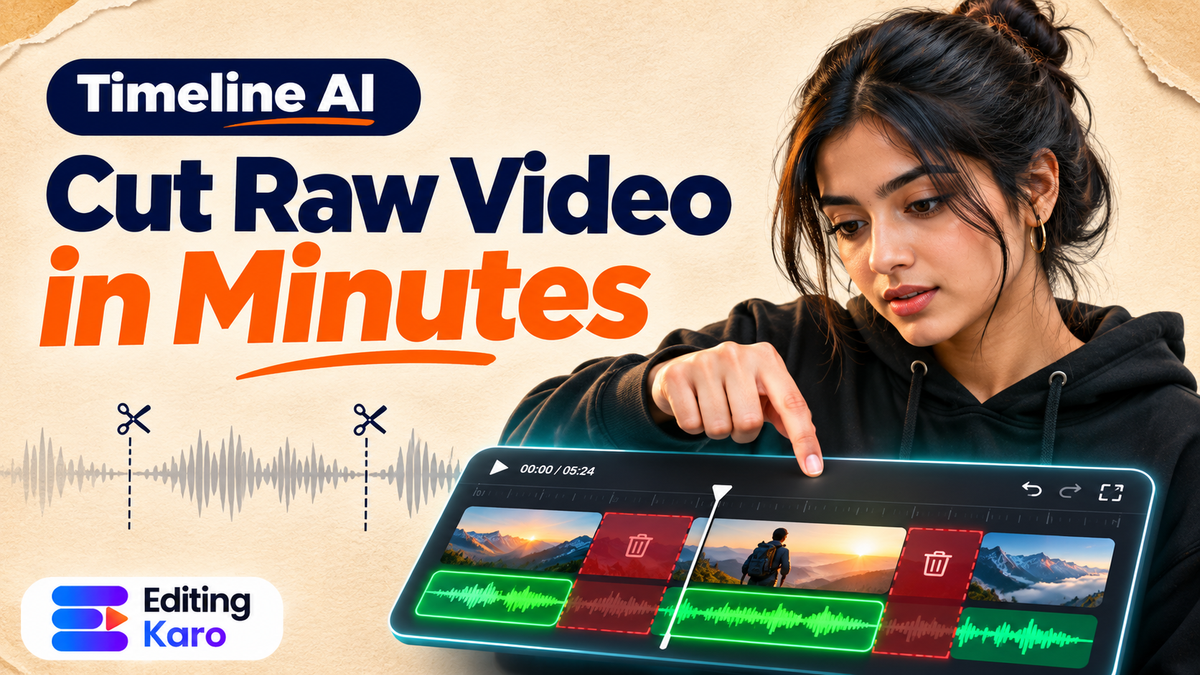
You sit down in front of your camera, hit record, and deliver a ten-minute tutorial. Because you stumbled over words, repeated three paragraphs, and paused to check your notes, you end up with 32 minutes of raw video footage.
Scrubbing through that timeline manually to find every false start, silence, and mispronounced word is the most exhausting part of content creation. It is tedious, mechanical work that drains your creative energy before you even begin color grading or adding motion graphics.
Using an ai video editor for raw footage fundamentally changes this dynamic. Instead of listening to 32 minutes of audio at 1.5x speed with your finger glued to the split shortcut, AI models can transcribe your speech, detect dead air, and assemble a clean rough cut in under two minutes.
Here is how to set up an automated video editing workflow that cleans up raw footage while preserving your natural speaking rhythm.
Why the rough cut takes so long (and how AI solves it)
In traditional video editing, creating the initial assembly cut involves four distinct passes:
- 1The silence purge: Finding every pause longer than 0.8 seconds where you glanced at notes or took a breath.
- 2The take selection: Comparing the three times you delivered the same intro sentence and deleting the two flawed takes.
- 3The filler word scrub: Trimming out reflexive verbal habits like "um", "uh", "you know", and "basically".
- 4The pace check: Tightening gaps between sentences so the delivery feels energetic and modern.
This manual process takes roughly three to four times the duration of your raw recording. A 30-minute recording easily demands two hours of mechanical cutting.
Automated AI timeline tools solve this by processing the audio waveform through speech-to-text and acoustic voice activity detection models. As documented in technical research on acoustic speech recognition and voice activity detection, algorithms can identify human speech phonemes within milliseconds, separating intentional speech from ambient pauses with high precision.
| Editing Task | Manual Timeline Editing | AI Automated Raw Footage Editing |
|---|---|---|
| Silence Removal | 30–45 mins of manual razor cuts | One-click silence purge based on dB thresholds |
| Deleting Bad Takes | Rewinding and scrubbing multiple times | Highlight and delete text in interactive transcript |
| Filler Words | Zooming into waveforms to snip syllables | Auto-highlighting filler tokens across the script |
| Jump Cut Masking | Manually keyframing scale on every clip | Auto-zoom punch-in presets alternating 100% and 112% |
| Turnaround Time | 2 to 3 hours per episode | 10 to 15 minutes of guided review |
Step 1: Set silence detection thresholds correctly
The secret to a natural-sounding auto-cut lies in your silence detection settings. If your settings are too aggressive, your speech will sound rushed, gasping for air, and robotic. If they are too relaxed, dead air remains.
Take a practical example: imagine an online educator in Hyderabad recording a 25-minute software tutorial with repeated takes and coughing pauses.
Follow these baseline settings:
- Volume Threshold (-35 dB to -40 dB): This tells the editor what volume counts as silence. If you record in a quiet room with a lapel or condenser mic, -38 dB is ideal. If your room has distant ceiling fan noise, set it to -32 dB so the fan hum is treated as silence.
- Minimum Silence Duration (0.5 to 0.7 seconds): Do not cut natural 0.3-second breath pauses between sentences; human speech needs rhythm. Set the minimum pause trigger to at least 0.5 seconds.
- Padding Buffer (120 to 150 milliseconds): Always keep 120 ms of padding before speech begins and 150 ms after speech stops. Without padding, the algorithm will chop off consonant sounds like "p", "t", and "s" at word boundaries.
Step 2: Use text-based editing to prune bad takes
Once silence is cleared, switch to text-based editing. Instead of staring at an abstract blue video clip, read through the generated transcript.
When you see a paragraph repeated twice:
"In today's video we are going to look at three index funds... sorry let me restart that... In this video, we will compare three top index funds."
Simply highlight the first botched sentence in the text window and press delete. The underlying video timeline automatically deletes those exact frames.
This text-first method reduces cognitive fatigue. Your eyes can scan three paragraphs of text in ten seconds, whereas listening to that same footage requires sixty seconds of timeline playback. When editing speech, review our advice in the Instagram Reels beginner workflow to keep intro hooks under three seconds.
Step 3: Mask jump cuts with dynamic punch-ins
When you remove thirty pauses from a stationary talking-head video, your subject will twitch and jerk across the screen at every cut point. These harsh jump cuts distract viewers unless you disguise them.
You have three clean techniques to smooth out these cuts:
1. The 112% Punch-In
Keep your first clip at 100% scale. On the very next cut, scale the clip up to 112% and re-centre the subject's eyes. On the third cut, return to 100%. This alternating wide-and-tight framing mimics a two-camera studio setup.
2. Auto-Framing and Tracking
If you recorded in 4K widescreen, you can use AI auto-reframe to track your head movements across a vertical 9:16 canvas. The virtual camera pans gently with you, converting a static wide shot into an active mobile format.
3. Contextual B-Roll and Captions
Drop relevant screenshots, photos, or motion text over the cut point. When viewers see a diagram or bold caption appear, their eyes focus on the new visual element rather than the speaker's shoulder shift. Check our guide on adding captions to short videos to master kinetic subtitle timing.
Step 4: Level audio and apply smart ducking
A polished rough cut needs balanced sound. If your speech volume swings wildly because you turned your head away from the microphone, viewers will constantly adjust their phone volume.
Apply audio normalisation to bring dialogue peaks to -1 dB and average speech to -14 LUFS, matching social media broadcast standards established by Meta Video Creator Best Practices.
Next, add your background music. Instead of manually drawing dozens of volume automation keyframes every time you talk, turn on smart audio ducking. The background music will automatically dip by 18 dB whenever your vocal track is active and rise gently during deliberate pauses.
Maintaining natural conversational pacing
While cutting dead air creates energetic videos, over-tightening your timeline can destroy the natural authority of your delivery. Silence is a vital storytelling tool when used intentionally.
Pay close attention to these three conversational moments before approving an automated cut:
- 1Dramatic pauses after key takeaways: When you deliver an important statistic or core insight, keep a full one-second pause. Viewers need a beat to digest complex concepts. If the AI cuts immediately to your next sentence, the idea loses impact.
- 2Emotional transitions: When switching from a lighthearted personal story to serious actionable steps, leave a brief visual pause. Adding a quick sound effect like a soft whoosh or camera click helps mark the transition.
- 3Question prompts: If you ask your audience a question like "How many times have you abandoned an edit?", let the question breathe for 0.8 seconds before diving into your answer.
Balancing algorithmic efficiency with human editorial intuition ensures your final video feels sharp without sounding like a panicked monologue.
Doing it in Editing Karo
Editing Karo integrates automated timeline intelligence directly into Motion Studio, removing the need for separate transcription tools and clunky offline render queues.
Here is how you handle raw footage inside the platform:
| Editing step | Feature in Motion Studio | Practical benefit |
|---|---|---|
| Automated rough cut assembly | Motion AI | Analyze raw clips, remove dead air, and build a cohesive timeline automatically |
| Multi-track timeline control | Timeline Editor | Fine-tune cut points, drag transitions, and manage multi-layered audio tracks |
| Auto-generated captions | Text and Captions | Create synchronized animated subtitles with bilingual English and Hinglish support |
| Audio recording & ducking | Audio and Recording | Record voiceovers directly, balance room noise, and duck background tracks |
| Clean social export | Motion Studio Export | Export watermark-free 1080p and 4K MP4s ready for YouTube, Reels, and LinkedIn |
Every plan opens all four studios in Editing Karo. Free accounts can test timeline editing and export standard video files. Subscribing to a paid plan unlocks Motion AI timeline automation, watermark-free rendering, and extended cloud storage.
A 15-minute raw footage editing routine
Follow this streamlined checklist whenever you import new camera footage:
- 1Import and detect speech: Load your raw video into Motion Studio and run speech detection with a 120 ms padding buffer.
- 2Review the text transcript: Scan the generated text to delete false starts, stumbles, and duplicate takes.
- 3Apply alternating zoom presets: Add 112% punch-ins on alternating talking-head cuts to eliminate jump cut fatigue.
- 4Generate animated subtitles: Turn on auto-captions and pick an animated preset with readable contrast.
- 5Verify export bitrate: Review our technical guide on why videos look blurry after upload to export clean 30 fps video.
Stop spending your evenings scrubbing through dead air. Open Motion Studio, import your latest recording, and let automated timeline tools build your rough cut in minutes.
Frequently asked questions
What does an AI video editor for raw footage actually do?
An AI video editor analyzes your recorded video and audio tracks, identifies pauses, coughing, and filler words, and cuts the timeline automatically. It creates an initial rough cut so you do not have to scrub through hours of footage manually.
Can AI video editors remove silence without cutting off words?
Yes, modern silence removers allow you to set padding buffers before and after speech. Adding 100 to 150 milliseconds of breathing padding ensures that the beginnings and endings of sentences are never clipped.
How does text-based video editing work?
Text-based video editing transcribes your video audio into written dialogue. When you highlight and delete a word or sentence in the text transcript, the editor automatically cuts the corresponding video frames from the timeline.
Does auto-cutting video silence hurt viewer retention?
Removing dead air and pauses usually increases viewer retention on short-form platforms like Instagram Reels and YouTube Shorts, where pacing needs to remain brisk and engaging to prevent swiping.
How do I hide jump cuts when AI trims my video?
You can disguise jump cuts by applying subtle punch-in zooms, alternating between wide and medium framing, or overlaying relevant B-roll clips, screenshots, and animated graphics over the cut points.
Can AI detect bad takes when I repeat a sentence?
Yes, advanced transcript-aware AI editors can identify repeated phrases in your audio and automatically flag earlier false starts, keeping only the final successful take on the primary timeline.
What decibel threshold should I set for silence detection?
A threshold between -35 dB and -40 dB works best for clean microphone recordings. If your room has background air conditioning or street noise, raise the threshold slightly to prevent room tone from being recognized as speech.
Can an AI video editor convert horizontal video to vertical Reels?
Yes, AI auto-reframe features track the primary speaker across 16:9 footage and pan the 9:16 viewport dynamically, keeping the subject centered without manual keyframe positioning.
Is it safe to let AI edit my entire video automatically?
AI should handle the rough cut, trimming dead air and assembling takes. A human editor should always review the pacing, emotional timing, and comedic beats before publishing the final cut.
How much time does AI raw footage editing save?
For talking-head vlogs, interviews, and course recordings, AI rough cutting typically reduces initial editing time by 50 to 70 percent, turning a two-hour trimming chore into a twenty-minute review.
Can AI edit multi-camera podcast footage?
Yes, multi-cam AI tools switch camera angles automatically based on which microphone receives active speech levels, cutting between host and guest views in real time.
How do I edit video using AI on mobile phones?
Several mobile editing apps offer basic auto-cut features. However, web-based editors with full keyboard shortcuts and multi-track timelines offer much greater control for precision trimming.
What audio formats work best for AI video transcription?
Standard 48 kHz AAC or uncompressed 24-bit WAV audio provides the cleanest frequency response for speech recognition models, reducing transcription spelling mistakes.
AI se raw video editing kaise kare fast?
Upload your video file to an editor with speech detection, click auto-cut silence, review the transcript to delete mistaken takes, and apply auto-captions before exporting.
Can AI balance my background music with my voice?
Yes, audio ducking features automatically lower the background music track whenever the voice track detects active speech, raising the volume smoothly during pauses.
Does AI video editing work with Indian English and Hinglish?
Modern multilingual speech engines handle Indian accents, regional terms, and Hinglish dialogue effectively, correctly transcribing mixed vocabulary on social video tracks.
What AI editing tools does Editing Karo offer?
Editing Karo features Motion AI inside Motion Studio, offering automated timeline trimming, intelligent beat detection, auto-captions, and smart timeline assembly from raw clips.
Do I need a paid plan to use Motion AI in Editing Karo?
Basic timeline editing, manual trimming, and standard exports are available on Free plans. Motion AI automated timeline generation and watermark-free exports are unlocked on paid plans.
Can I export my AI rough cut to other editing software?
You can complete your entire edit and render directly in Motion Studio, or export rendered high-bitrate clips to incorporate into existing post-production pipelines.
What video file formats can I upload to Motion Studio?
Motion Studio accepts MP4, MOV, WebM, and standard mobile video recordings up to 4K resolution, supporting standard frame rates including 24, 30, and 60 fps.